How to
How To Install A Fishfinder
Feb
How To Install A Fishfinder
Installing a fishfinder is an important part of any fishing trip. It can help you find the best spots to catch fish and make sure that you don’t miss out on any of them. In this guide, we will take a look at the steps involved in installing a fishfinder, from installing the binnacle mount to completing the job. We will also discuss some tips and tricks to make sure that your installation goes smoothly and that your fishfinder works properly. By following these steps, you will be able to install your own fishfinder with ease and confidence.
Take on this simple electronics installation, and you’ll see what lies beneath your boat.
You’ll probably have to install or replace a fishfinder sooner or later, whether you’re an avid angler, casual fisherman, or weekend cruiser. Fortunately for us, this is a simple DIY project you can complete when it comes to binnacle-mounted units that use transom– mounted transducers, the most popular fishfinder installations on the water. You only need a few tools and the know-how, which are provided right here in this article.
Tech Support
Degree Of Difficulty: Easy to moderate
Tools:
- Phillips-head screwdriver
- Power drill and bit(s)
- Wire crimper/stripper
- Wire fish
- Fishing rods (for testing your handiwork, after the installation is done)
Material (with West Marine pricing):
- 3M 5200 Adhesive/sealant $14
- Adhesive-lined heat-shrink tubing $5
- Cable ties $3
- Clamshell fitting $3
- Mounting hardware (usually included with fishfinder)
- Silicon sealant $10
- Crimp connectors $3
- Terminal connectors $4
Project Cost (based on West Marine pricing): $42
Approximate Yard Time/Cost: This is a straightforward job and shouldn’t take a pro more than an hour or so. The national average cost for a marine electronics installer runs about $80 an hour but many have minimums, so you can plan on saving around $100 by doing the work yourself.
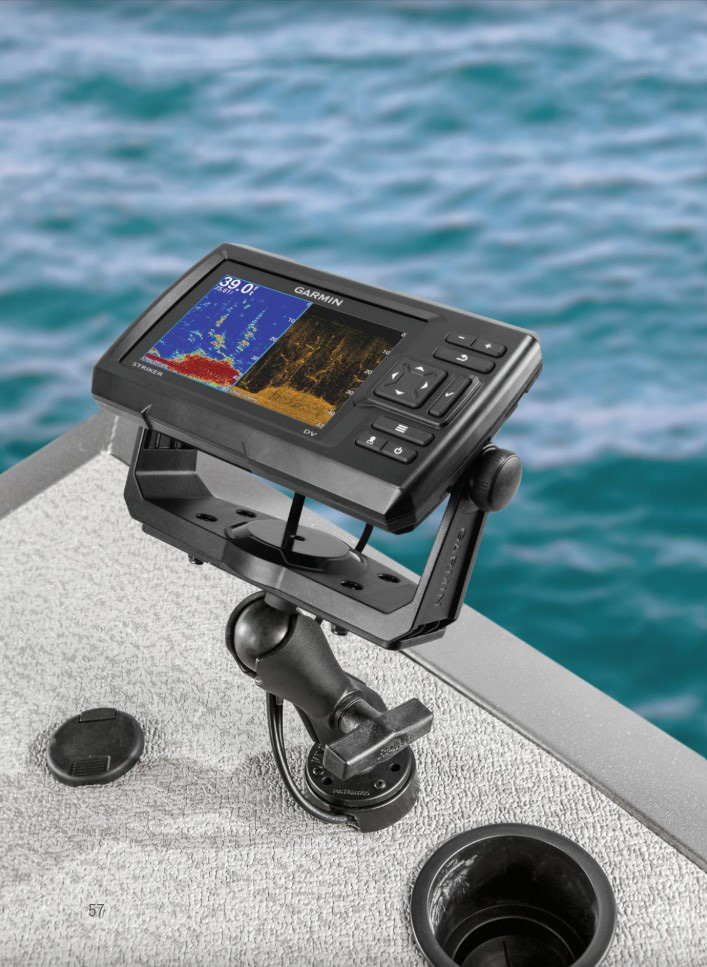
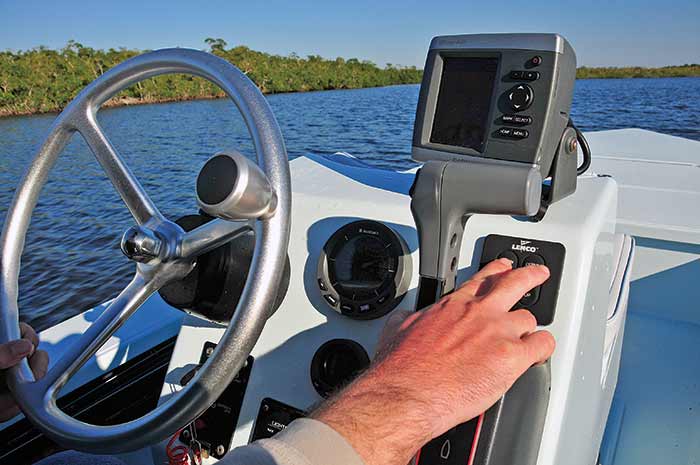
Step 1: Installing The Binnacle Mount
You must locate the ideal location before starting this mounting job. The best viewing angle is provided by keeping the fishfinder as close to the helm as possible. The unit should be between waist– and shoulder-high, and avoid hanging down from a hard top or in an electronics box because doing so will require you to crane your neck and cause neck strain. Additionally, confirm that the unit’s location permits tilting and/ or turning without causing damage to the affixed parts, such as the windshield, throttle, and compass.
Check the helm station from the back or underside to make sure there are no obstructions there and enough space for wires and bolts to protrude. The ABYC specifications allow for up to four terminals per stud, so now is a good time to find the power bus and/ or fuse block and make sure you have them available. Once you’ve decided where to put the mounting holes, either use the fishfinder’s built-in binnacle template or use it as a template to mark the spot. Your power drill should always be running at full speed to drill out the mounting holes( a slowly turning drill bit is more likely to catch the edges of the gelcoat, causing it to chip and splinter).
The unit’s wires now require an entry/ exit point. The less holes in your helm, the better. Check the console to make sure there aren’t any holes from a previous gear installation that you can re-use before drilling one out. You’ll need to drill a hole behind the binnacle mount, assuming you don’t get off so lightly. Before drilling, place the binnacle and fishfinder temporarily in place to make sure there is enough room between the mount and the hole for the wires to pass through without making any sharp bends. Make certain it is big enough to accommodate all of the unit’s wire. Otherwise, chafing might develop and the wires might rub up against the hole’s edge.
Run a silicon sealant bead around the binnacle mount’s base and around each hole once all holes have been drilled. After installing the binnacle, dab the ends of each bolt with silicon before inserting them. Now use Nylock locking nuts designed for aircraft to fasten the bolts to the helm.
First things first: Find the best location for your fishfinder.
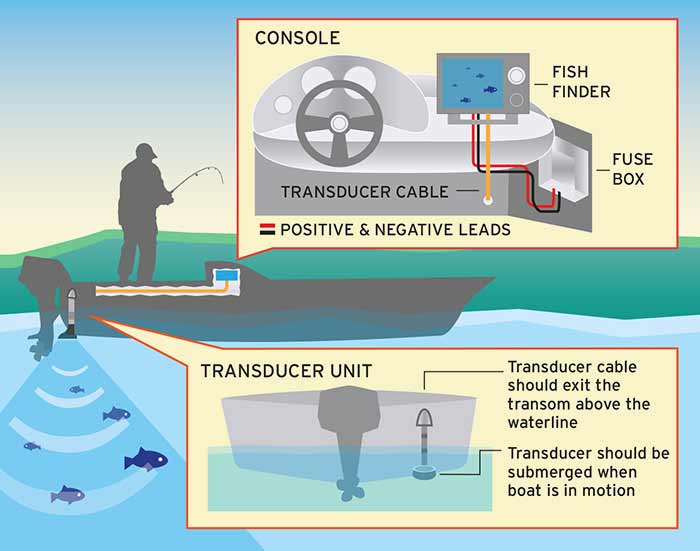
Step 2: Running The Power Leads
You might or might not need to lengthen or shorten the power leads depending on how long the supplied wires are. Use the proper color-coding and tinned copper wire( boat cable) of the manufacturer’s recommended gauge if you need to lengthen them. Crimped barrel connectors should never be soldered when making wire-to-wire connections, and heat-shrink tubing should be used to protect them. Additionally, avoid removing the manufacturer’s included in-line fuse; doing so could cause the unit to fry and invalidate the warranty.
Until the plug is free as to reach the unit without any additional wiring being exposed outside the helm, push the power leads through the hole you drilled. Run the wire to the fuse block of your helm after that. Use tie-wraps or cushioned clamps to secure the wires every 18 inches, minimizing droops and slack. Install female spade connectors at the ends of the power leads in your fuse block, and heat-shrink tubing will be used to protect the connections. Use ring connectors of the proper size if the terminals are screw-type. While you finish installing, leave the terminal ends unplugged.
Step 3: Mounting The Transducer
Before you start the actual installation, you must find the ideal location. In order to prevent strakes, through-hull fittings, or other objects from interfering with the smooth hull in front of it, stand behind the transom and search for a space as deep as possible. Turbulence is produced by anything that disrupts water flow, which reduces the fishfinder’s effectiveness.
Once you’ve located the ideal location, position the transducer bracket so that it is perfectly horizontal and about 1/ 8 of an inch below the hull’s running surface. Mark the mounting holes of the bracket with a pencil. But now is the time to connect the transducer’s wire to the dash before mounting it.( Do this after mounting, or you risk unintentionally jerking on the wire and ruining the sealant’s grip.) Cut the transducer off at the end and use the old wire to pull the new fishfinder through the wiring chase if your boat already had one. If not, you’ll have to pull the new transducer wire and plug through it from scratch using a wire fish.
Coil any additional wire inside the helm and fasten it with tie-wraps or cushioned clamps after you’ve routed it up through the hole you created and pulled all of the wire to it. WARNING: Never reduce the transducer wire’s size because doing so will increase the resistance of the wires, which will affect the performance of your fishfinder. Second, avoid connecting the transducer wire to the engine’s wiring harness or VHF cable because doing so can result in electrical interference that will affect the performance of the device.
Drill pilot holes with your power drill for the mounting screws of the bracket using the markings you previously made on the transom. The mounting screws and the transom holes should then be liberally coated with 3M 5200 adhesive/ sealant. Screw in the mount while keeping the bracket in place. Make extensive use of the adhesive/ sealant. Your transom should not have any holes that allow water to seep through.
Step 4: Completing The Job
Seal the wiring hole you created behind the binnacle mount to protect the wires inside your helm. If at all possible, seal it with a grommet( silicon sealant will do if you can’t find one that fits). Then, cover the hole with the clamshell vent, mark the drill holes, and screw it down. You are now prepared to finish the wiring connections. Connect the power leads, turn off the battery, and then plug the fishfinder’s power and transducer wires into the back.
Hold on a second, please. Make certain the transducer mounting hole sealer, 5200, has plenty of time to dry before you launch the boat for a test run. Don’t rush this; it might take up to a full week in some circumstances. You must be absolutely certain that there won’t be any water intrusion.
The fishfinder will almost certainly function properly when the boat is first launched and idled away from the dock. However, when you press the throttle and board the plane, issues with transom-mounted transducers frequently arise. The transducer is probably a little likewise high( in some cases, it might ride completely out of the water) if your unit wholly loses reading. If the bottom reading fluctuates, it’s probably just a tiny bit too high or low enough to cause turbulence. Fortunately, almost all transducer brackets have some adjustment room. Until you find the ideal height, try raising or lowering the transducer in 1/ 8-inch increments. However, keep in mind that not all transom mounts perform well at high speeds. You’ve done a great job if you can reach speeds of 30 mph or higher while still maintaining good reading.
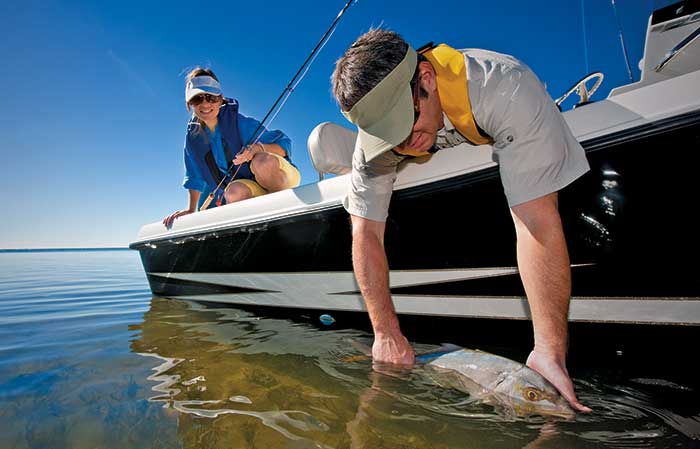
Everything is operating flawlessly, right? Excellent work. Find out how that new fishfinder will assist you in filling the cooler by trading in those tools for a rod and some bait. Get a waterproof cover to protect that new unit once you’re finished. A cover that slides over the entire fishfinder will perform better than the majority of those offered by the manufacturer, which only protects the LCD screen.